 |
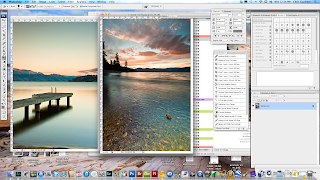
| The Original (L) and Composited version (R) |
Compositing landscapes is something I've touched on before. Just wanted to share a quick look into a transformation process of how one of these happens, filters and layers I use and why it may help you.
Compositing hardly even requires photoshop. You can even complete this task sufficiently with Photoshop Elements, I am doing it on CS3 because I can't afford to update software all the time. haha So a few quick steps and a breakdown of what you may see in each screenshot here in this post.
There are many ways to do this, and to be honest, every time I composite landscapes (which isn't very often) I use different techniques. This is one of them.
 |
| Both starter images |
2. Isolate the foreground from your image, I went from the bottom of the image to the top of the mountains, straight black and white, no fading necessary at this point. Magic selector worked well.
3. drop your dock/lake/mountain foreground onto the background with nice sky. I had to do a little selective stretching of my clouds to make them take up more space, also had to cover up the silhouetted trees in the nice sky picture.
 |
| Sky dropped in, but colors don't match |
4. Your colors probably wont look like they match off the bat. In mine, I like the sky colors more than the water colors with somewhat greenish tint in there, so I'll be tweaking foreground more than the sky.
5. Duplicate sky layer, and flip vertically, drop it over top of the water, and do a color blend mode, also try a hue - it can depend on your color mixture. Then I blurred the color layer pretty heavily since my water was shot with a long exposure and is fairly smooth itself.
 |
| Brightness Evened out |
6. Mask out the color-blending-layer over the dock and mountains, you just want the color of the reflective water to change.
7. Selective brightened each layer individually with a grey gradient and overlay blend mode. The intention of this step was to unify the global lighting. So brightened towards the centre frame and a little darkening towards the edges, as if the sun over the horizon was producing the glow.
8. Did more selective dodge and burn, super fast. Brightened top of dock, a few fiery cloud tips, while darkening some other spaces.
 |
| Colors balanced, selectively dodged and burned clouds, dock and mountains |
9. Almost done - applied a photo filter layer, with a deep blue color to both layers, this helped unified their colorization. You can play with the density slider, and the color to suit your image.
10. That was it. All in all took about ten minutes, but I still prefer to stick to lightroom for my editing, if the picture doesn't grab me right off the bat, I won't bother with it.. (that is until a couple years later and you might be looking for a photo to play around with, or to improve upon).
Have fun in your compositing.
C Gardiner Photography | Promote Your Page Too
